This article covers the following topics:
- Navigating to Document Requests
- Responding as a Guest User
- Responding as a Subscribed User
- Approving and Publishing the Document Folder
Navigating to Document Requests
If you received a Document Request from your Partner, you will receive an email notification for you to log in and upload the requested documents.
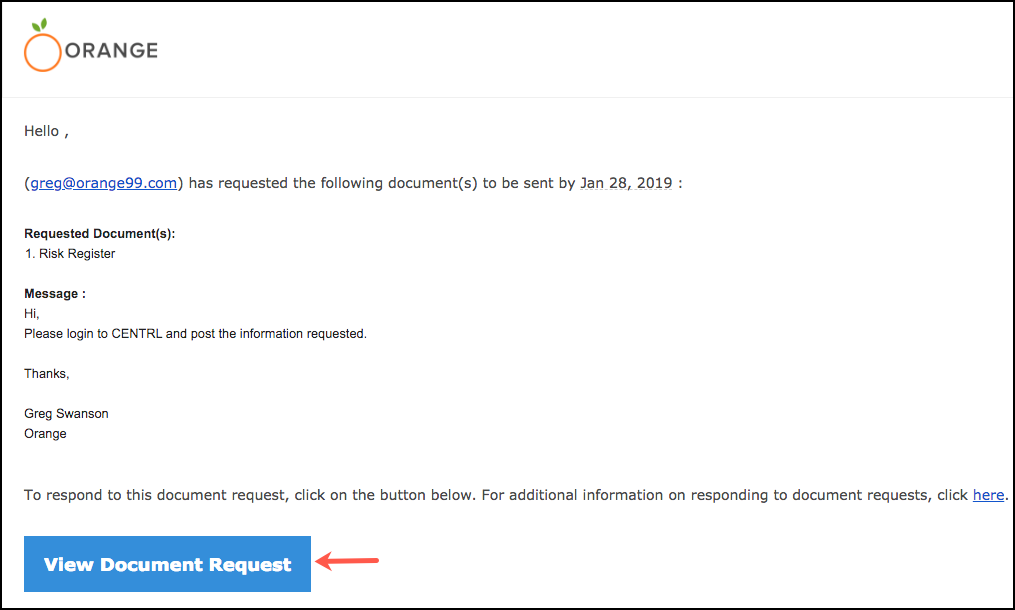
1. To view the Document Request, click on the View Document Request button as shown above.
Note: If you are not a registered user, you will be prompted to register for CENTRL.
Responding as a Guest User
If you are a Guest user, using the Requests screen, you can view and respond to all the document requests your partner has sent you.

1. Navigate to the Partners module from the sidebar and click on the Requests link as shown above.
2. Click on the Respond tab under the Actions column.
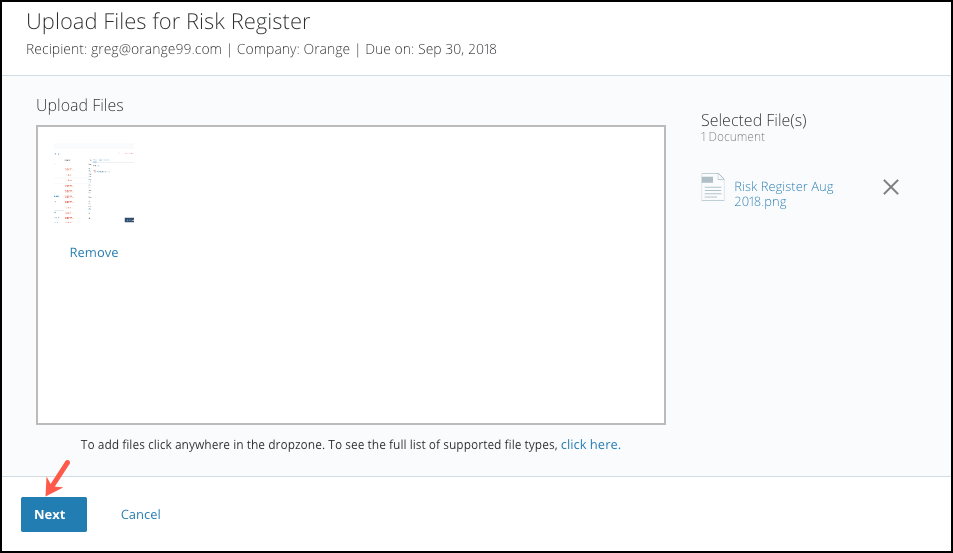
3. You will be taken to an Upload modal. Click anywhere within the dropzone to upload files. You can upload up to 20 files together to create a Folder for approval and publishing.
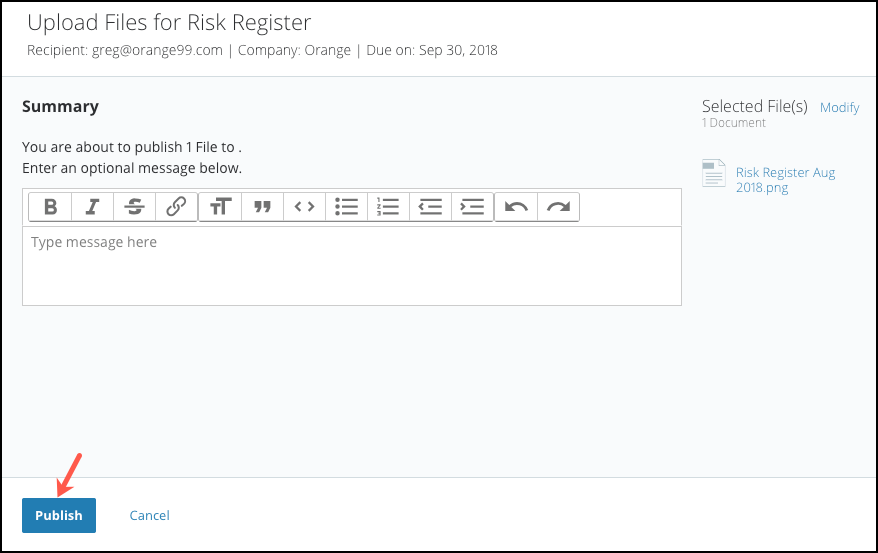
4. Click on the Publish button to send the requested document to your Partner.
Your Partner will be notified via email that the Document Request has been fulfilled.
Responding as a Subscribed User
If you are a subscribed user, you can respond to document requests using the Documents module.
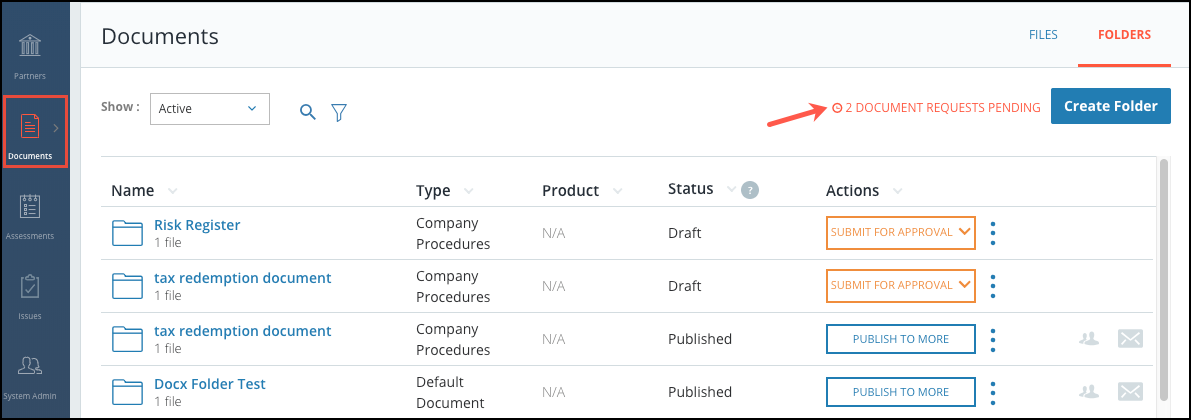
1. Navigate to Documents from the sidebar and click on the Request Pending link as shown above.
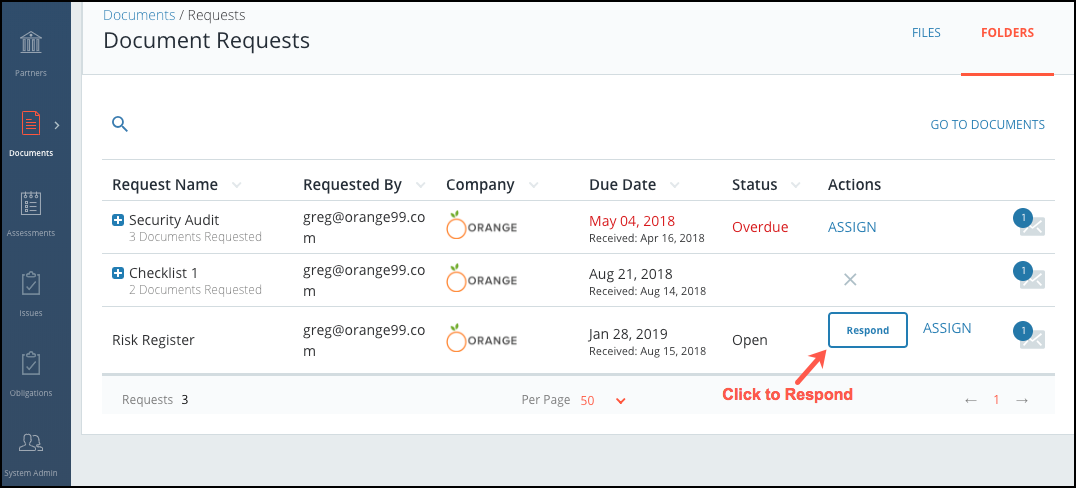
2. Click on the Respond button as shown above.
Respond by Publishing Existing Folder
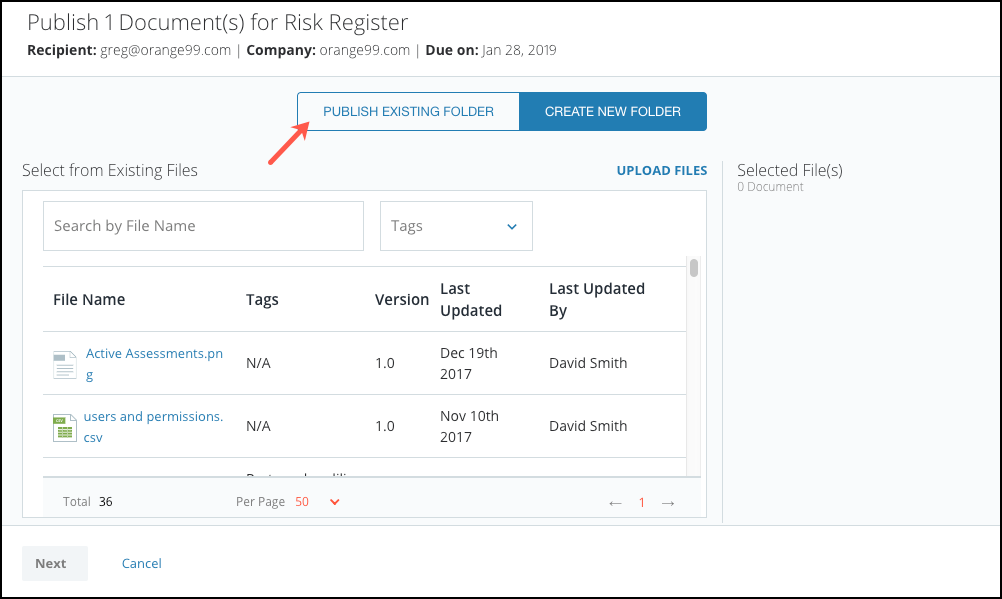
1. Click on the Publish Existing Folder link as shown above.
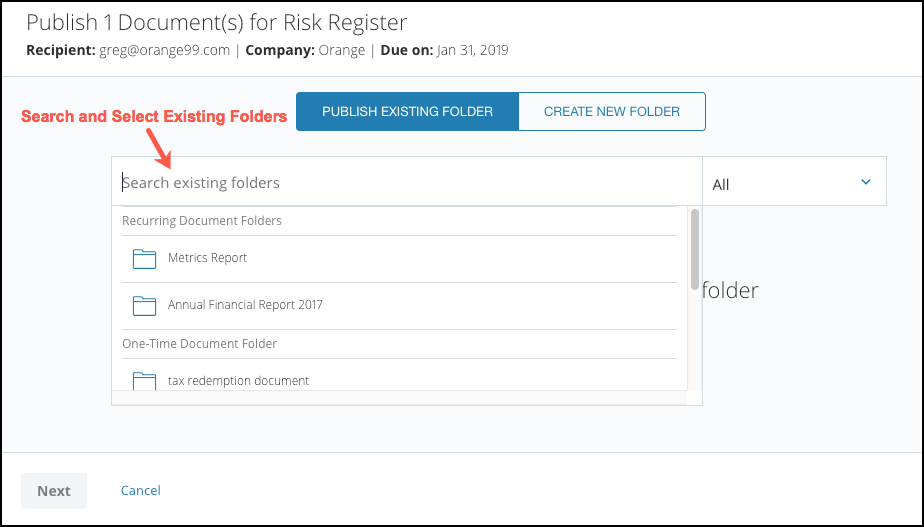
2. Search and select from the existing Folders and click on the Next button.
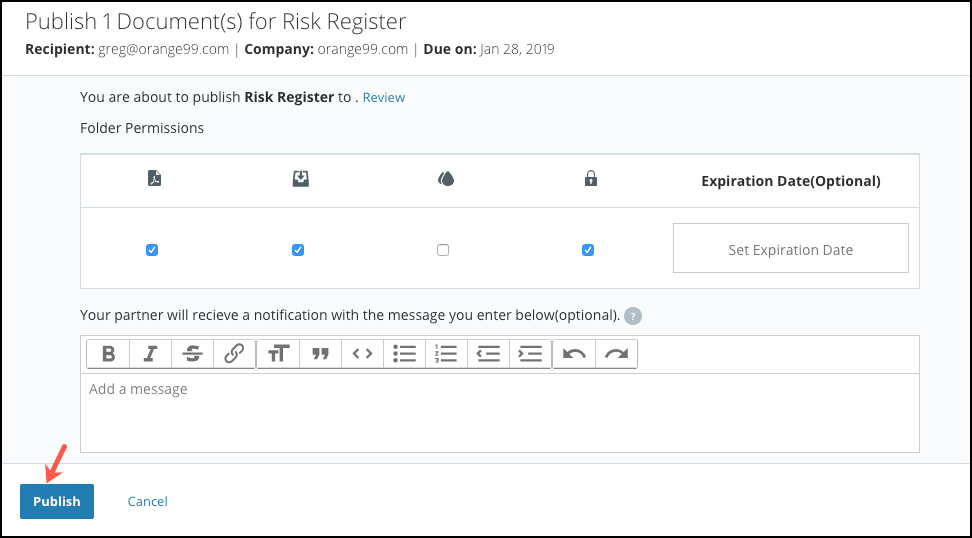
3. You can modify your Folder permissions and set a due date along with an optional message for your Partner.
4. Click on the Publish button to proceed. Your Partner will be notified via email that the Document Request has been fulfilled.
Note: The status for the document request will change from In Progress to Complete.
Respond by Creating New Folder
You can respond to a Document Request by either selecting files from your library or by uploading new files.
Select Files From Library
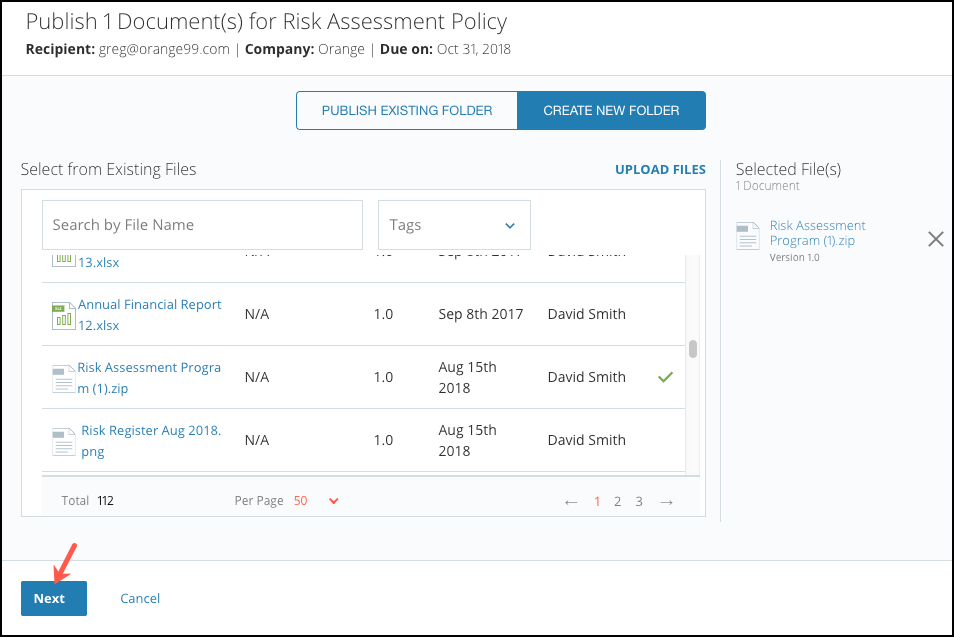
1. Select your file(s) and click on the Next button.
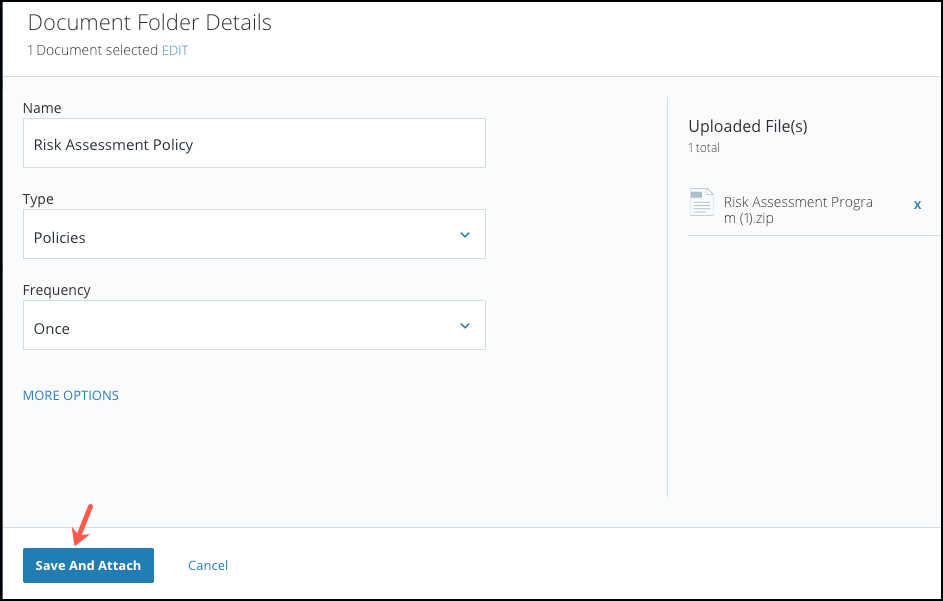
2. Within the Document Folder Details modal, you can give your Folder a name, select the document type and the Frequency for it.
3. Click on the Save and Attach button to proceed.
Upload Files
Alternatively, you can upload a new file or files to create a new Folder to eventually publish to your Partner.
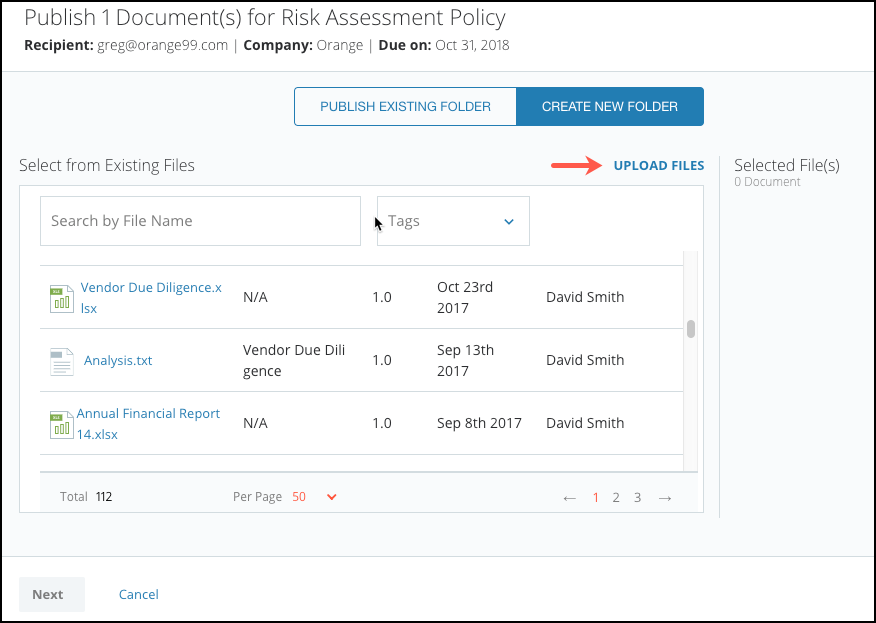
1. Click on the Upload Files link as shown above to upload new files that do not exist in your File Library.
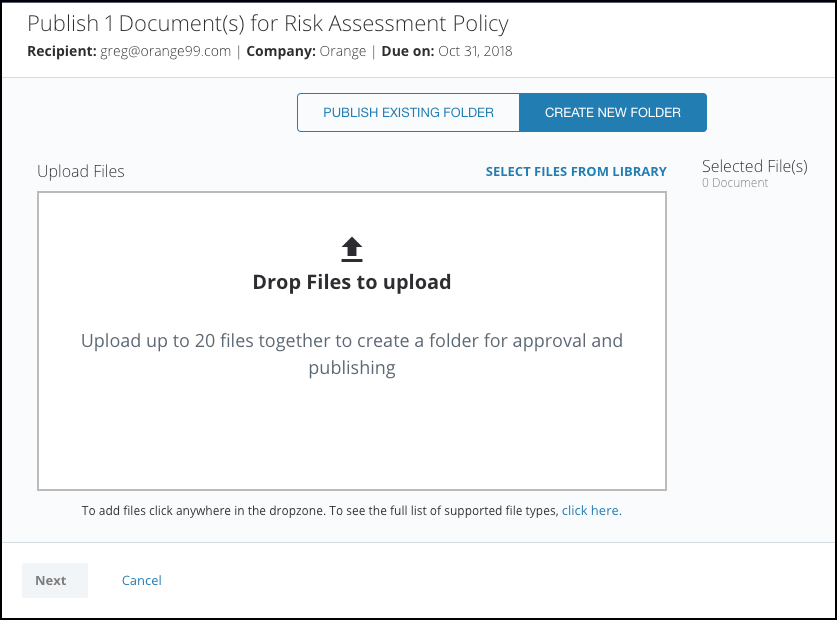
2. Click anywhere inside the drop zone and upload your file(s).
3. Click on the Next button to proceed.
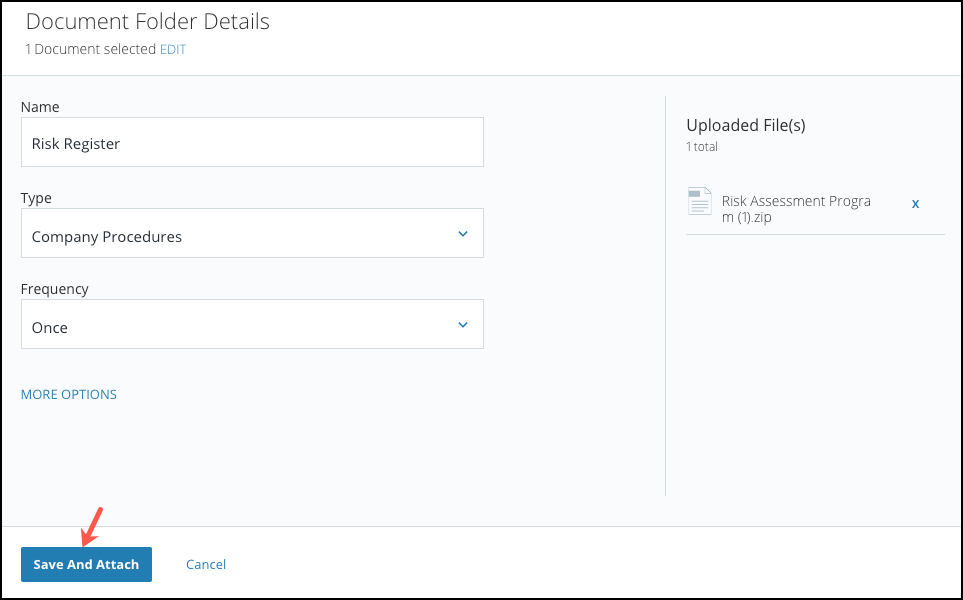
4. Enter the Document Folder details and click on the Save and Attach button to proceed.
Approving and Publishing a Document Folder
In CENTRL's workflow, you can only publish Document Folders that have been approved. When a Document Folder is created, the Document starts in a Draft status and eventually transitions to either an Approved or Published questionnaire.
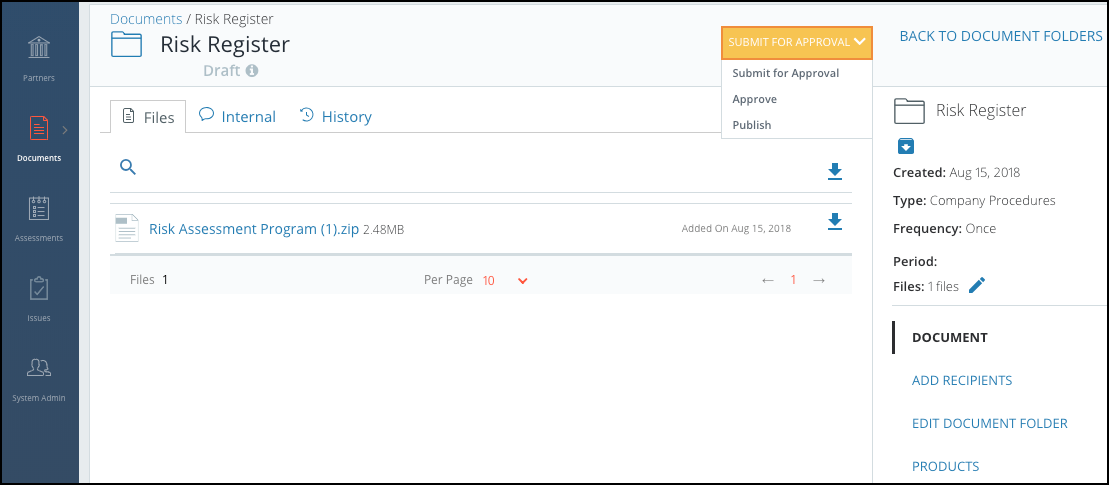
1. After creating a Folder, you will be taken to the Overview page. Once you are ready, click on the Publish button to send the Document Folder to your partner.
Note: Only Users who have the Approve and Publish permission enabled in their user profile under Role Permissions or who are Document Admins can approve and publish a Document Folder.
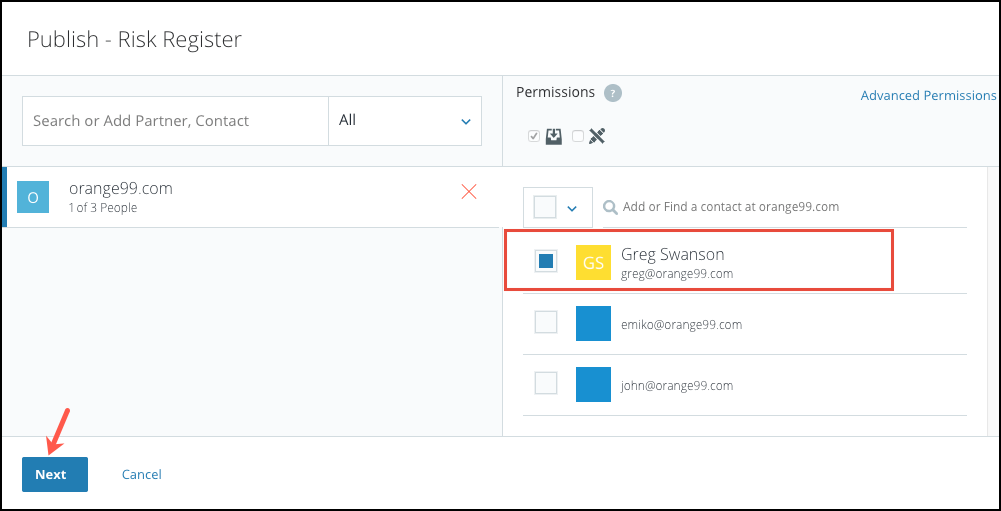
2. Within the Publish modal, The recipient will be pre-selected. You can select or add more recipients if you wish. You can also modify your Folder permissions by clicking on Advanced Permission if required. Click on the Next button to proceed.
Note: You can publish the same Document Folder to more than one recipient within the same company, but can only publish the Document Folder to one partner at a time.
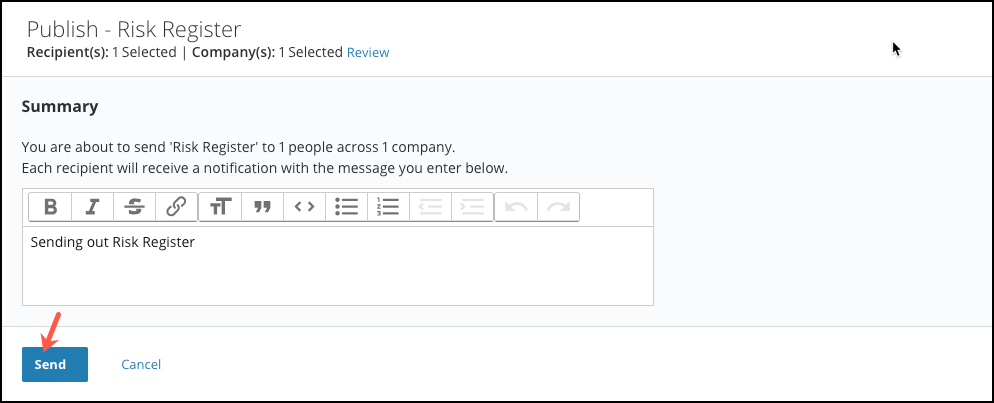
3. Within the Publish modal, you can review your Document Folder details and send an optional message if required. Click on the Send button to proceed.
Your Partner will be notified via email that the Document Request has been fulfilled.