Release Notes From CENTRL
We are excited to introduce new features and enhancements for our upcoming release on July 17th, 2018.
Here's what to expect:
Assessments Module
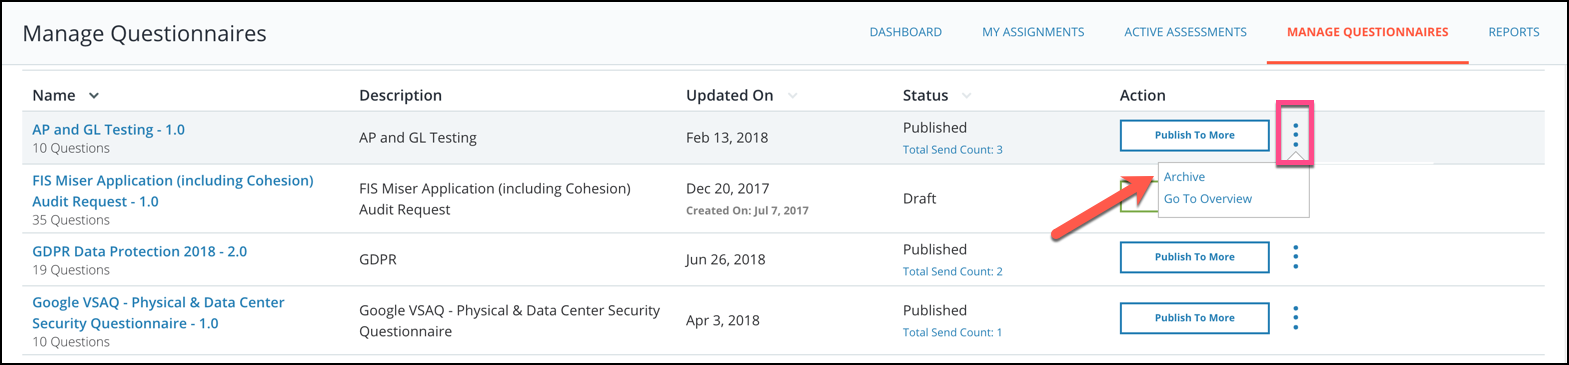
- Archiving questionnaires will be available on the Manage Questionnaires page to help users maintain the page. To archive a questionnaire, users can click the three dots on the right of the questionnaire and select Archive.
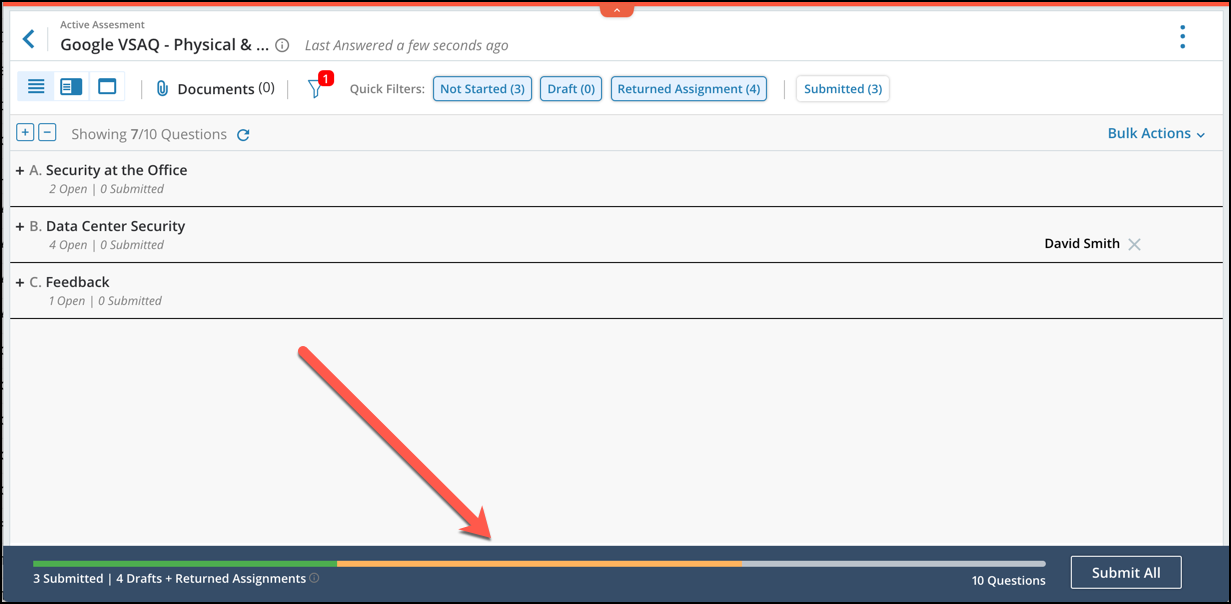
- New progress bar based on statuses when responding to assessments to track the progress of the assessment.
- Bulk actions for assigning and submitting questions will be selected before choosing the questions. To begin a bulk action, click on the Bulk Actions button on the top right of the question list. Choose whether you would like to Assign or Submit the questions (Questionnaire Owners will have the option to Submit To Partner).
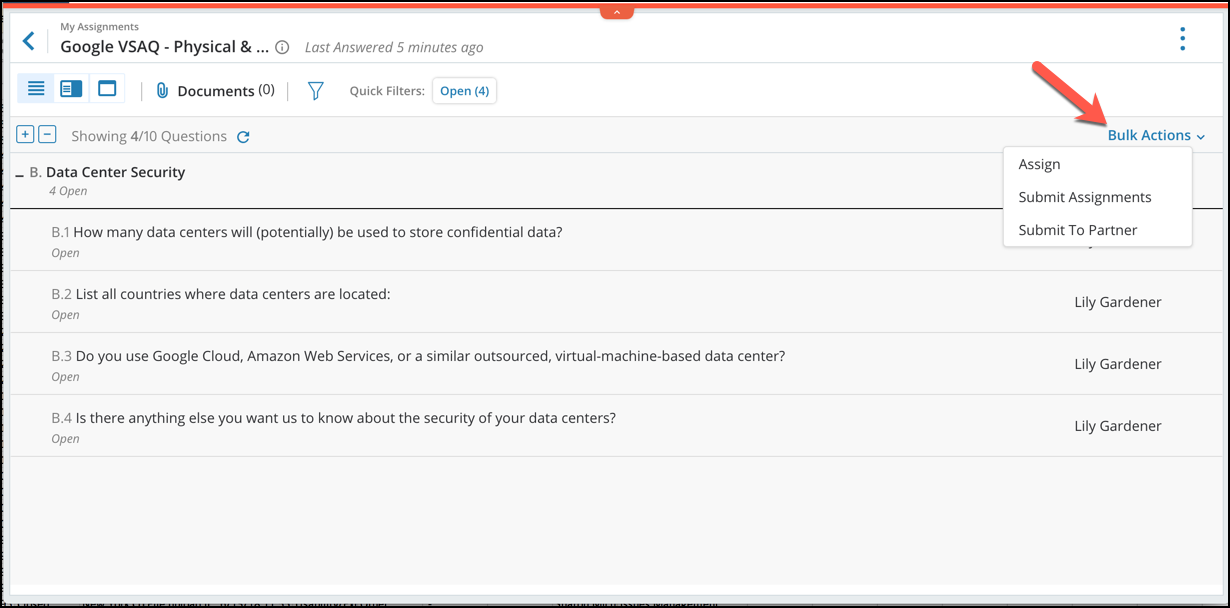 Then select the questions you would like the action to be taken on and submit. Depending on your selected action, you will be prompted to either select the user you are assigning to or confirm submission.
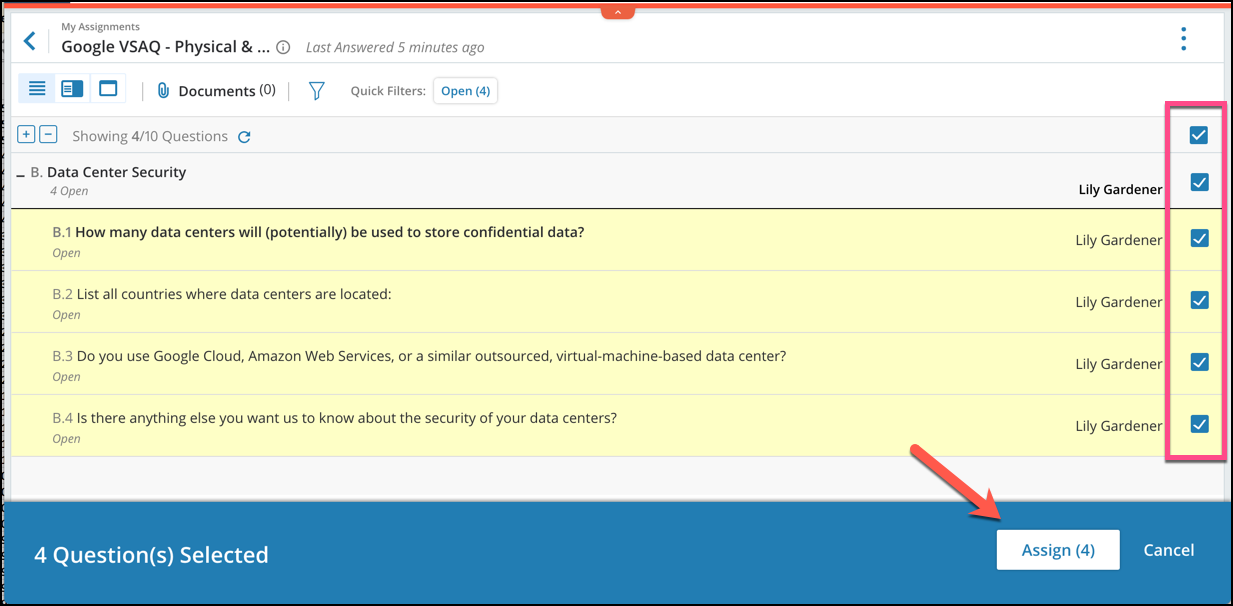
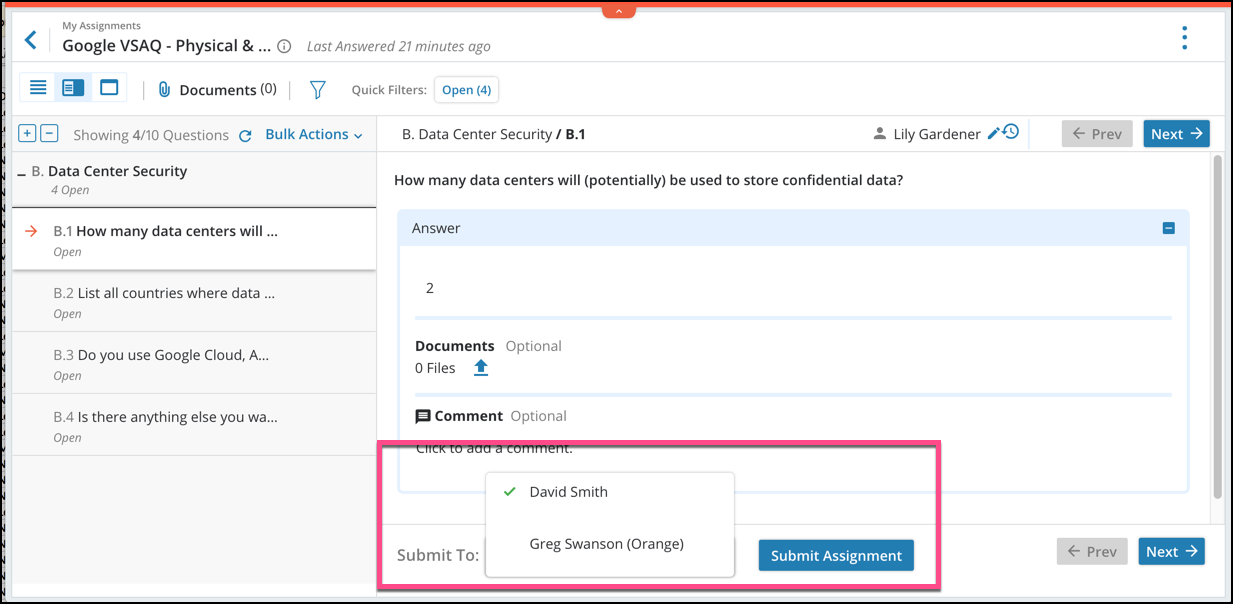
- For assigned questions, Questionnaire Owners and Admins can submit the question back to the assigner or directly to the partner. This can be done on the question level by selecting the user at the bottom of the question or by using Bulk Actions as shown previously.
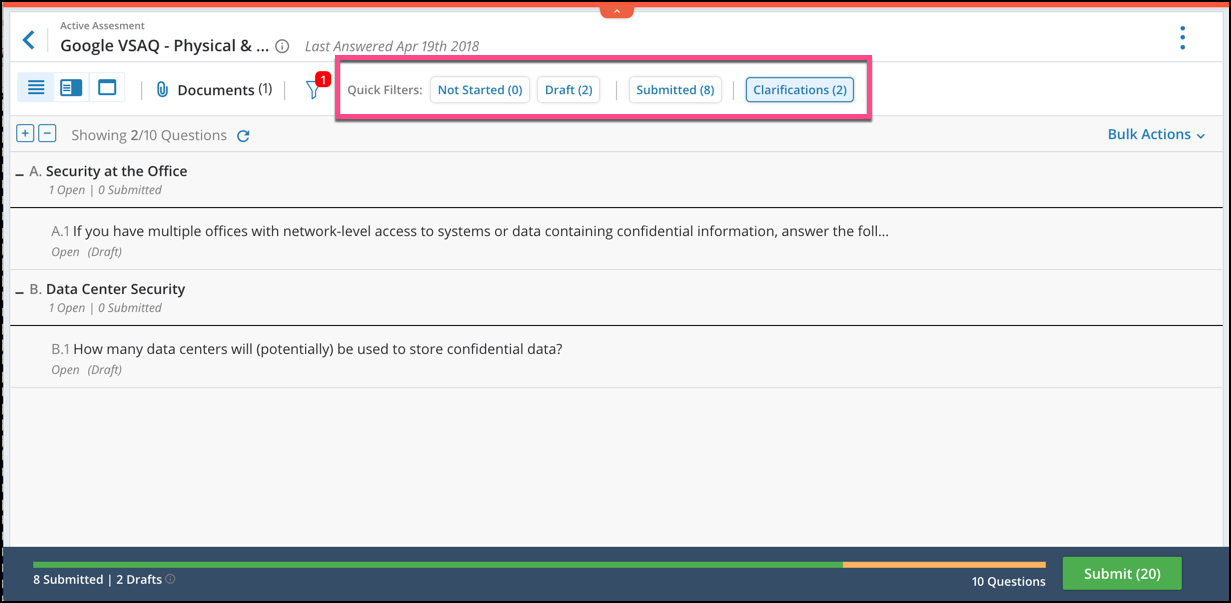
- Quick filters has been simplified for faster filtering.
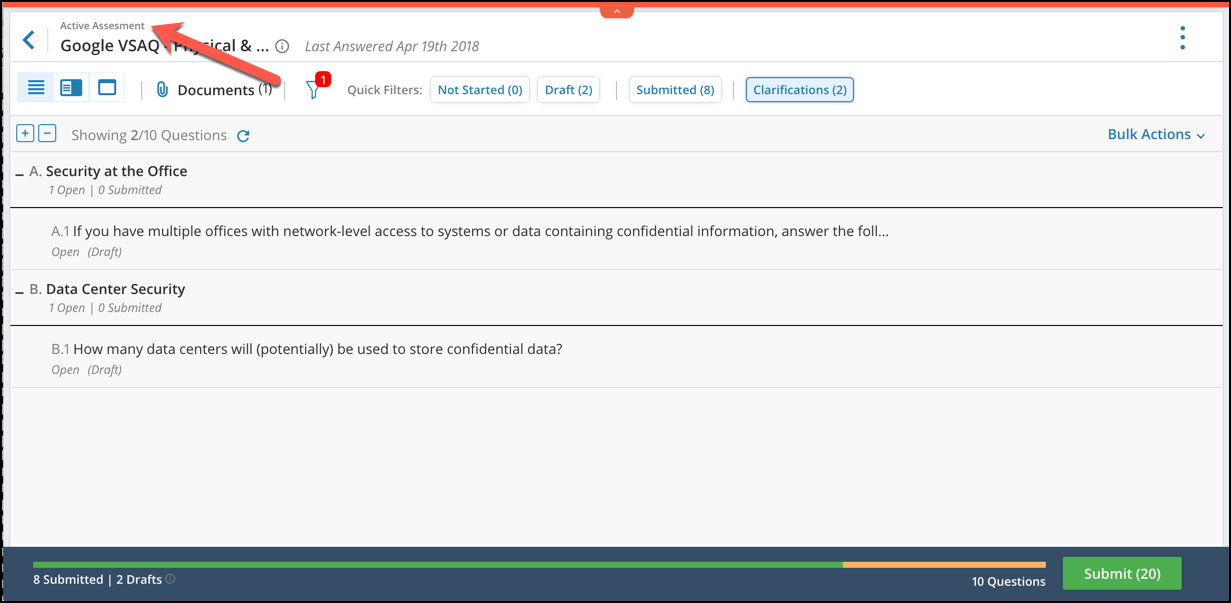
- The header in an assessment will show whether the user came from My Assignments or Active Assessments.
Issues Management Module
- Users will be able to see the ID and Issue Name in emails.
- Internal comments will now have a Submit button interaction.
Privacy360 / GDPR and California Consumer Privacy Act
- GDPR dashboard to see all your processing activities with the ability to segment based on risk, issues, and other attributes.
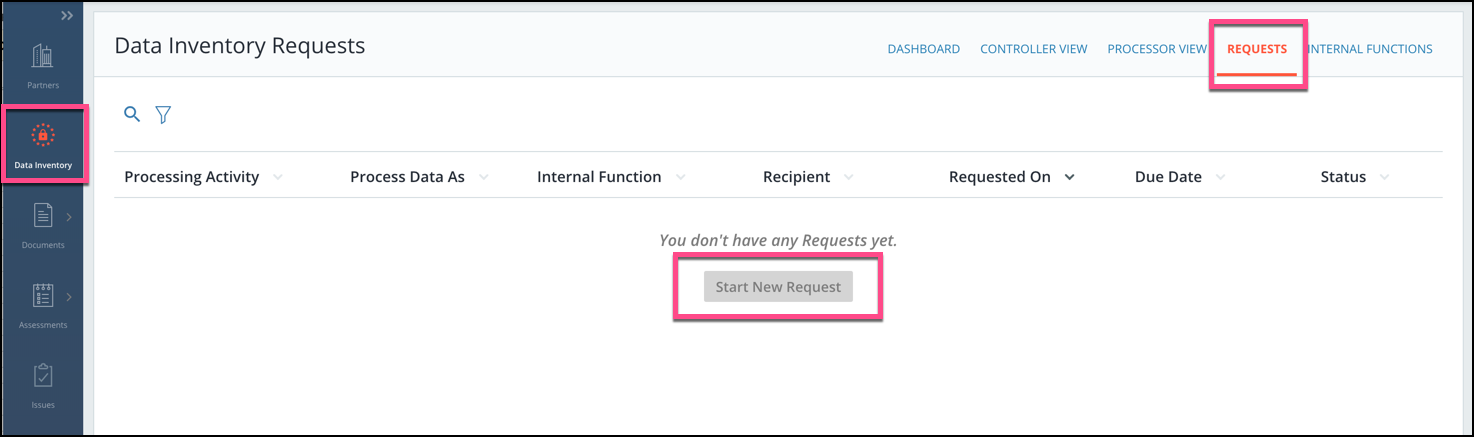
- Users will be able to send Data Inventory Requests to partners allowing DPO's to automate the creation of their data inventory. To create a Data Inventory Request, go to the Data Inventory module and select the Requests tab. From here, you can click Start New Request to begin the request.
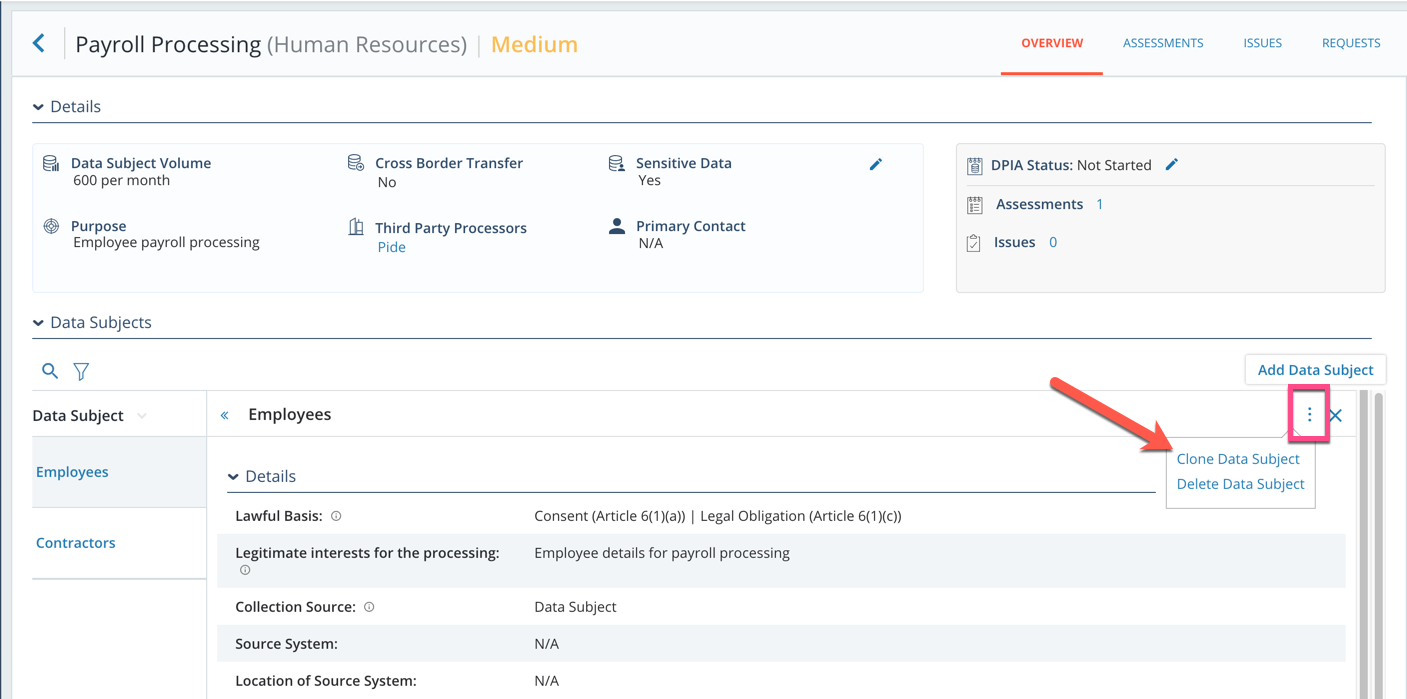
- Users will be able to clone data categories, data subjects, and processing activities. To clone data categories or data subjects, click the three dots on the upper right of the section and select Clone Data Category or Clone Data Subject.
 To clone processing activities, go to the Processor View tab and select the three dots to the right of the processing activity you would like to clone and click Clone.
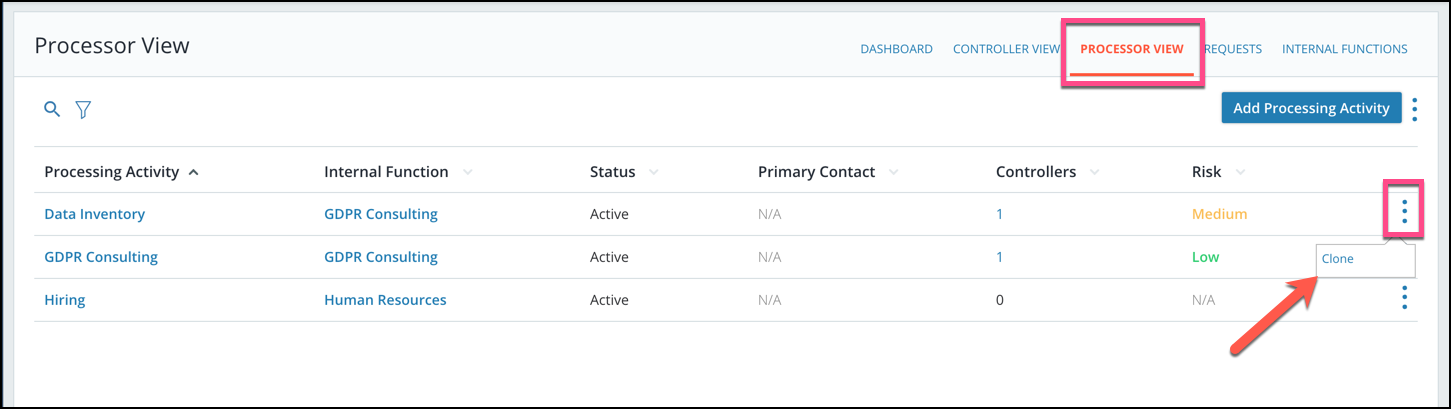
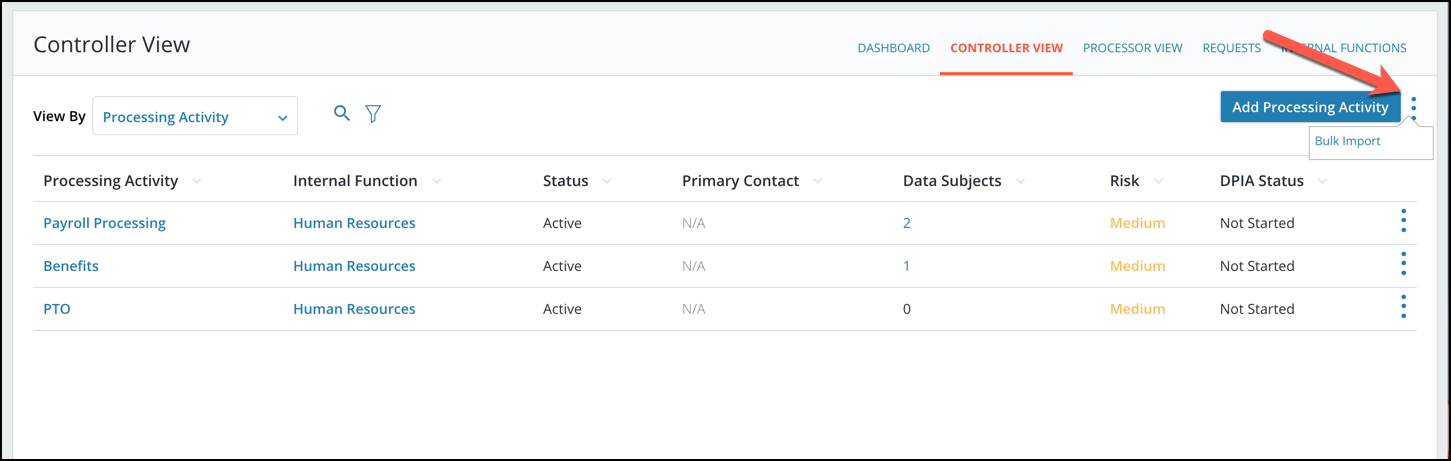
- If a user has an existing data inventory, they can now bulk import their data into CENTRL's platform. To bulk import, select the Controller View or Processor View tabs and click the three dots on the right side of the Add Activity button. Then select Bulk Import. Here you will be able to upload a CENTRL approved template to upload your data inventory.
- Users can now see the impact of data subjects across processing activities
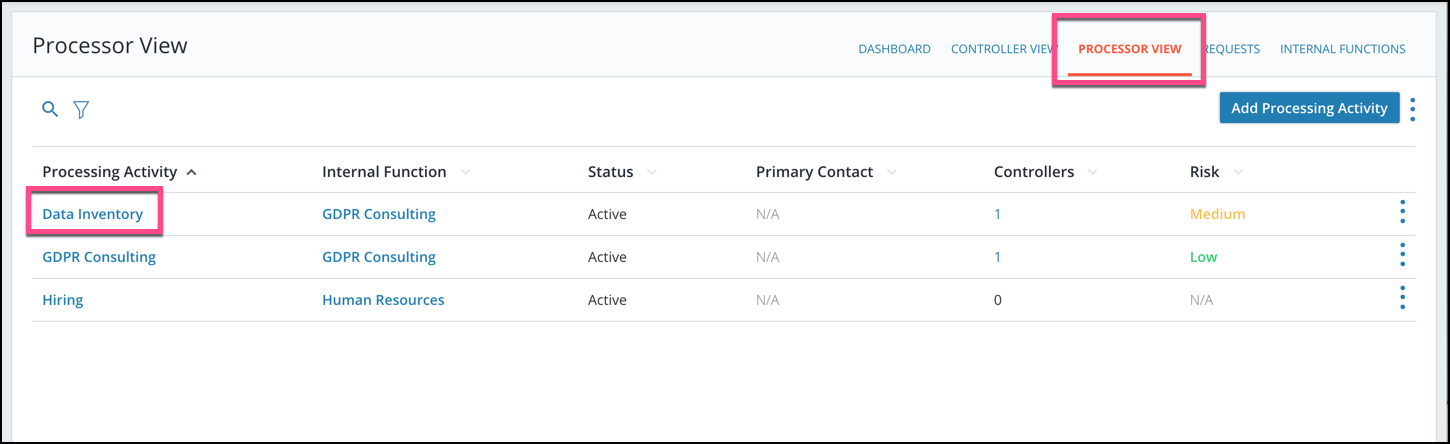
- For activities in which your company is a processor, you will be able to add data categories and sub-processors. To add data categories and sub-processors, click the Processor View tab and select your processing activity.
 From here, you can click the Data Categories or Sub-Processors tab. Then click Add Data Category/Sub-Processor on the right side to add a new line.